Last week I showed my latest dresser transformation.
BEFORE
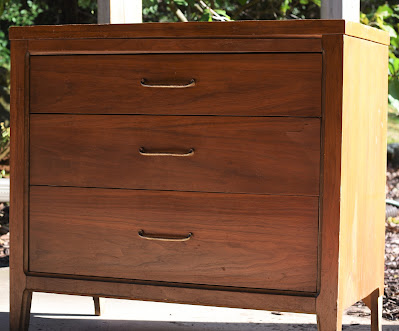
AFTER
This week is all about how I transformed this dresser
and what products I used.
This is not a sponsored posts. I wasn't compensated
for any of the products that I used. All of my
opinions are my own and unbiased. Some of the
products that I mention are ones that I have used
numerous times and some are new to me that I
was impressed with the quality and ease of use
and thought that they deserved being mentioned.
Before I start, I want to mention that I didn't
take many pictures during the transformation
process. I tend to get caught up in the moment
trying to figure things out
and forget about taking pictures. Hopefully,
you will be able to follow along anyway.
So, lets get started on this transformation.
Once I started working on this dresser I realized that the sides
were just a piece of 1/4" wood veneer
and the top piece
was pressed board with a layer of wood veneer over it.
All of the veneer was removed from the dresser.
The sides and top piece were completely removed and
Hubby and I created new ones with
pieces of solid birch wood.
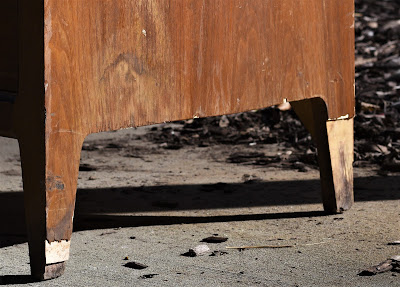
After removing the damaged veneer from the
drawer fronts I discovered a big chunk of the
wood was missing from the 2nd drawer.
Dang it!
I couldn't just sand the drawer fronts and
be done with them.
I filled in the hole with wood filler, let dry,
and sanded it smooth.
New wood veneer needed to be applied
to each drawer so that they would all
have the same wood grain finish.
I knew that I wanted to stain this dresser and not paint it.
I had to order new wood veneer for the drawer fronts.
Each drawer was sanded and cleaned and ready
to apply the new wood veneer.
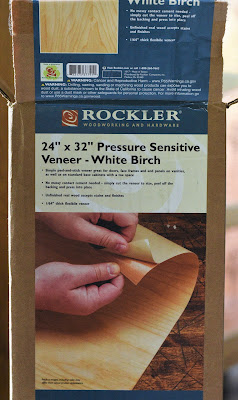
When the new veneer arrived for the draw fronts
I was surprised that it came
in a box rolled up. I was expecting it to be a flat sheet.
This is the wood veneer that I used for the drawer fronts.
If you're not familiar with what wood veneer is,
it is paper thin cuts of natural wood
that is applied with glue and can be
stained or painted.
I had never used wood veneer before and was a
little intimidated by it. I pulled it out and unrolled it
and laid a sheet of plywood on top of it for a few
days to try and flatten it out. I really didn't have to
worry about flatting it out. This veneer was so
incredibly easy to cut and apply.
It adhered so smoothly without any cracking or bubbling.
Using a utility knife I cut out each drawer front and applied.
Super, super easy to apply. I was very impressed with this veneer.
Here is a close up of the drawers with the new veneer applied and stained.
You can't even tell that there is wood veneer on this dresser.
To create the new sides
Hubby used (2) 2' x 4' x 1/4" sheets of birch plywoodand roughly cut out the leg opening.
The sides were then adhered using wood glue and set to dry overnight.
Once dried and secured I was able to sand the leg opening
smooth to match the leg shape.
The top of the dresser was created using a piece of 3/4" 2' x 4' piece of birch plywood. I wanted the top
of the dresser to be a 2 inch thickness. In order to have
a 2 inch thick top Hubby built it up using scrap wood.
To finish the edges of the top to look like a solid piece
of wood I used this veneer edge banding.
Can you tell it's not a 2" thick piece of wood?
The final step was to apply the veneer edge banding around the front of the dresser.
Using the same edge banding, I applied it then trimmed it down to size using
a utility knife.
Once all the veneer had been applied, I lightly sanded the entire
dresser down and applied the stain. I combined 2 different
stain colors to achieve the look I was going for.
I first applied 2 coats of Minwax Special Walnut.
The color was a little too red for me so I then
applied 2 coats of Minwax Weathered Oak.
By applying the weathered oak it knocked down
the red tone to a nice warm brown color.
Exactly what I was aiming for.
Minwax Special Walnut and Weathered Oak.
To protect all of our hard work,
I applied 3 coats of water based Minwax Polycrylic
in Clear Satin to the entire dresser.
Hubby drilled new holes and added the new
handles (which I ordered off Amazon)
and just like that, we were done.
By investing a little bit of sweat equitywe now have a beautiful new dresser.
How appropriate is my sign that I made 2 years ago?
Until Next Time,
Stay safe.
Veronica