Sunday, July 31, 2016

Homemade Southwest Salsa and Tortilla Chips

I was going to reveal the project that I made for
our Son and DIL but we were unable to meet
up with them last weekend.
So instead, I thought that I would do a recipe post.

With the gardens coming on strong, and fresh
produce is everywhere, what do you do with
all that fresh goodness?
We in this household eat A LOT of fruits & vegetables.
We never have to worry about produce going bad here!
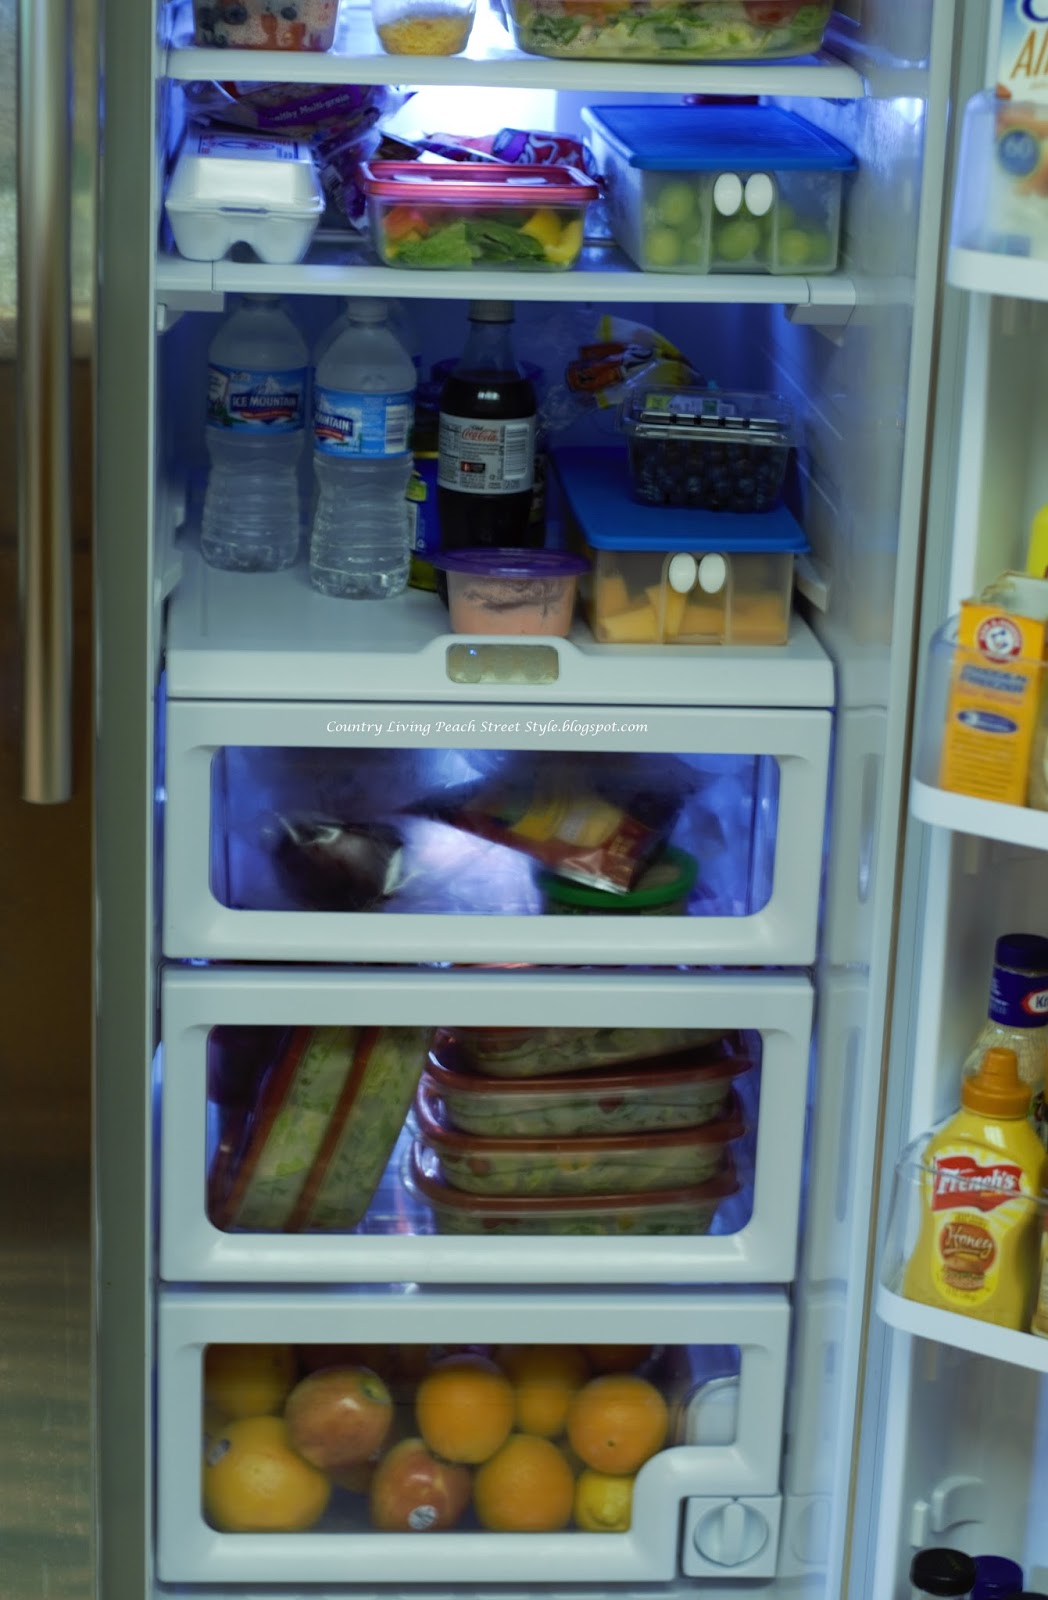
We eat a salad EVERY day, so every
Sunday I will make our salads and prepare our fruit for the week.
I have been doing this for YEARS!
By me preparing these ahead of time it is easy for Hubby and I
to just grab-n-go when we are heading off to work.
The big bonus is, we get our daily requirements
of fruits and vegetables!
We rarely buy anything out of the vending machines at work.

This is what our refrigerator looks like on Sundays.

Another thing that you can do with your fresh fruits and vegetables is
make salsa.  We LOVE salsa of any kind!
Salsas are SO EASY to make.  I will even make salsa in the wintertime
using frozen fruits and vegetables, along with Homemade Tortilla Chips.

Here is how I make my Southwest Salsa.

Chop up all of your vegetables and add to a bowl.
Add the remaining ingredients and give it a good stir.
Place into the refrigerator for a few hours to blend all the flavors together.
  I use this handy little chopper that I bought from
 Pampered Chef, it makes chopping quick.
Now lets make those easy tortilla chips!

These chips are WAY better than store bought chips.
These are perfect for dipping, unlike store bought
chip that break when you dip them, these don't, plus
these have SO MUCH more FLAVOR!
Hubby doesn't want me to buy store bought tortilla chips again,
they're that GOOD!

All you need are 3 simple ingredients.
This is the brand that I buy to make my chips.
I usually make the whole bag to yield a BIG bag of chips.
It really doesn't matter what brand of tortillas you use,
we just happen to like this brand.
Here is a close up of the tortillas I buy.
Lightly brush each tortilla with Extra Virgin Olive Oil.
I brushed 4 tortillas and stacked them on top of each other.
Slice the stack of tortillas in half, and then in half again.
Place the tortilla chips in a single layer onto
a cookie sheet lined with parchment paper,
and lightly sprinkle with Sea Salt.
Place into a preheated oven set at 350 degrees for 10-12 minutes,
or until lightly browned.  Remove from oven and let sit for 1 minute.
DIG IN!

SOUTHWEST SALSA
2 cups pineapple, chopped in small cubes
1 cup canned black beans, rinsed and drained (optional)
1/2 cup frozen sweet corn
1 cup tomatoes, chopped
1 red bell pepper, chopped
1 green bell pepper, chopped
1/4 cup red onion, minced
1/4 cup cilantro, finely chopped
2 tablespoons freshly squeezed lime juice
Salt and pepper to taste

INSTRUCTIONS:
Mix all ingredients together in a large glass bowl.  Refrigerate for 2 hours to let juices combine together.


HOMEMADE TORTILLA CHIPS

1 package soft tortilla shells
Extra Virgin Olive Oil
Sea Salt

Lightly brush each tortilla shell with EVOO.  Cut in half, and in half again.  Place the tortilla chip in a single layer on a parchment lined cookie sheet.  Bake @ 350 for 10-12 minutes.

Once you make your own salsa and chips you won't want store bought again!

That's it for this week, hopefully next week I can show
you what I made for our Son and DIL.

Until Next Time,
Veronica

Sunday, July 17, 2016

Summer Napkins

I was going to do a post about something I
made for our Son and DIL but I haven't given it to them yet.
 I never know when our DIL is going to check out my blog posts.
It's something that our DIL wanted to know if I could make,
so no posting early because I don't want to spoil the surprise!
I will be meeting with them next weekend
so I will be able to share it with you then.

I promise that this will be the
last post about strawberries this year!

I actually made these strawberry linen napkins back in May.
I just never got around to posting how I made them.

Here is a closer look at them.
Aren't they lovely?
And they are machine washable!

I made 8 of these all white linen napkins about 2 years ago
and had them tucked away in a drawer.  I knew eventually
that I wanted to add a design to them, I just wasn't sure what.
So there they sat for 2 years.

When I spotted this strawberry image on the Graphic Fairies website,
I knew just what I wanted to add it to.

I made a set of 4 strawberry linen napkins!

If you can iron and cut with scissors,
you can do this also.

Here's how I transferred my image
onto the linen napkins.

I picked up this Transfer paper from Joann Fabric's.
As you can see, you can add your image to whatever
fabric item you would like to decorate.
Decide what image you want to use and
print the image onto the transfer paper
following the enclosed instructions.
(the instructions are very easy to follow)
*Make sure you reverse your image before printing*
After your image has been printed
and allowed to set, it is time to cut
out your image.  You want to make sure
that you cut very close to the image,
otherwise your image will look like one
of those fake tatoos, and I'm pretty sure you
don't want that look!
You want your image to look like it was painted on.
Simply place your image onto your fabric item
face down and iron in place.
Slowly peel off the backing paper to reveal your
new creation.

That's  it!
A beautiful new creation!
Wasn't that simple?
This project cost me a total of $2.00 to make 4 beautiful linen napkins!
Try finding that kind of deal for 4 high end, custom made linen napkins!
That's it for this week.
I'm off to work on another project!

Until Next Time,
Veronica

Sunday, July 10, 2016

Schmears

Schmears?
What the heck are Schmears?
Flavored Butter?
Do you know what Flavored Butter is?
What about Cream Cheese Spreads?
All of these are considered Schmears.
Get it?  You schmear these on rolls, bagels,
sconces, hot biscuits or whatever you desire.

Have you ever went to Texas Roadhouse and
had one of their warm rolls with the Cinnamon Honey Butter?
Who am I kidding.  Who can eat just one roll!
Oh My Sweet Country Cooking Goodness!
I had a block of cream cheese in the refrigerator that
I wanted to use up.  Since we picked SO MANY
strawberries again this year I thought that I would
make some Fresh Strawberry Butter to top my
morning Blueberry bagel with.
No boring bagels in this household!
As you can tell I use a heavy hand when I apply my
Fresh Strawberry Butter to my bagels!
Granted I don't eat these every day,
usually just on the weekends.
These will hold me off until Lunch time
when I will eat a small salad.

Am I making you hungry yet?

Schmears are so incredibly easy to make,
but be careful, these are additive!

Here's how I make my Fresh Strawberry Butter.

Gather your ingredients and a Food Processor.
Add your softened butter and cream cheese to the food processor.
Pulse to combine until you have a smooth and creamy consistency.
Add the remaining ingredients and blend until smooth,
making sure to scrape down the sides.
That's it!
Place into a covered container and refrigerate to chill.

You can make your Schmears with whatever fruits, nuts or
vegetables you like.  You can even make them low fat.
Just replace the full fat cream cheese with reduced fat cream cheese.

There is nothing better than Homemade Schmears!
At least in my opinion.
Of course I'll share the recipe.

Fresh Strawberry Butter

1 stick unsalted butter, room temperature (if using salted butter, omit adding salt)
4 ounces cream cheese (can replace with reduced fat)
1/2 cup ripe fresh strawberries, diced
1/4 cup confectioners' sugar
1/4 teaspoon salt
1/4 teaspoon fresh squeezed lemon jiuice

Add softened butter and cream cheese to food processor and pulse until you have a smooth consistency.

Add remaining ingredients and blend until smooth, making sure to scrape down the sides.

Place into a covered container and refrigerate to chill.

That's it for this week.
Until Next Time,
Veronica

Sunday, July 3, 2016

Red, White and Blue Turnovers

Happy Independence Day!

Are you celebrating Independence Day?

I didn't feel much like doing anything this
year so we will be staying home and
enjoying the beautiful weather.

I was able to bake a Patriot dessert though.
This is my version of a Red, White and Blue dessert.

I made Turnovers using strawberries, blueberries and cream cheese,
Hubby's favorite combinations of fruits and cheese.
Oh My Sweet Liberty are these ever GOOD!
And since it's Independence Day I pulled
out my Independence Hall Staffordshire Ironstone plate to use.
What a perfect match of Red, White and Blue!
Turnovers are so easy to make.
I know, I know, I sound like a broken record.
I'm always telling you how easy everything is.
But it's the truth!

You don't have to stuff your Turnovers with
just fruit.  You can use veggies, meats, cheeses,
or whatever your little heart desires.

Stay with me and I'll show you just how
easy these are to make.

To get started you will need a package of Puff Pastry Sheets.
You can find these in the frozen dessert section at your local grocer.
And your fillings of choice.
Remove the Puff Pastry sheets from the box and thaw out.
Once thawed, open each sheet and cut into 4 squares per sheet.
Add a dollop of cream cheese mixture onto each square.
Add a spoonful of fruit.
Dip your finger in the fruit juice and spread a line of juice
around the outside edges of the square,
this will help seal your turnover.
Gently fold from corner to corner, creating a triangle.
Dip a fork into the fruit juice and crimp the edges together.
Brush entire top of pastry with an egg wash mixture.
(egg white with a little water or milk)
Place onto a parchment lined baking sheet and bake.
THAT'S IT!
Remove from oven and let cool.
I drizzled the tops with a simple Lemon Glaze.
Hubby couldn't wait for these to be done.
He said that they smelled so good baking,
and I totally agreed with him.
He didn't even complain that I was baking
when it was 91 degrees outside.
Thank goodness for central air!
Here's the recipe!

RED, WHITE and BLUE TURNOVERS

TURNOVERS

1 package puff pastry sheets, thawed
1 and 1/2 cups chopped strawberries
3/4 cup blueberries
3 tablespoons granulated sugar
1 tablespoon cornstarch
 4 ounces cream cheese, softened
1/4 cup powdered sugar
1/2 teaspoon vanilla extract
1 egg white, lightly beaten

GLAZE

1 cup powdered sugar
1 tablespoon milk
1 tablespoon lemon juice
1/2 teaspoon vanilla extract

Preheat oven to 400 degrees.  Line 2 baking sheets with parchment paper and set aside.

Remove puff pastry from package and thaw out.  Cut each sheet into 4 squares (you should have
8 total squares), set aside.

In a medium size bowl, mix together chopped strawberries, blueberries, granulated sugar and cornstarch. Set aside.

In a separate bowl, mix cream cheese until smooth.  Add powdered sugar and vanilla. Mix until combined.

Add a dollop of cream cheese mixture to each puff pastry square.
Add a spoonful of fruit mixture to each square.
Line outer edges of puff pastry with fruit juice and fold over and crimp with a fork dipped into fruit mixture.

Brush each pastry with egg wash.

Place onto lined baking sheet and bake for 17-20 minutes.

Remove from oven and cool completely.

GLAZE:

Mix powdered sugar, milk, lemon juice and vanilla extract until combined.  Add more milk if needed.

Drizzle glaze over each pastry top.


                                                                           ENJOY!


Have a safe and happy Independence Day!

Until Next Time,
Veronica