Sunday, January 29, 2017

I Have A Few Hang-ups

I am one of those annoying people who
likes to have everything neat, tidy
and organized. We work hard for what
we own and  want to take good care
of what we have.
Some call it perfectionism, I call it living
 a less stressed well balanced life, plus
being financially smart.
I don't do well in a cluttered environment.
My brain doesn't function well and
I become stressed.
I don't like wasting precious time
searching for things, or spending needless
amounts of money buying stuff I know
we already own but can't find.
Over the years I have become
much more organized.
It is an ongoing process.
One of the areas that I have finally
tackled was our Master closet.
While Hubby was on vacation I finally was
able to get in there and clean things out.
I ended up taking 6 large garbage bags
of clothes to Goodwill to donate, and
that was just my clothes!
I still own a lot of nice clothing and
want to keep it in good condition and shape.
I like to hang up my sweaters,cardigans
and blazers so that I can see what I have.
I am able to put together an outfit much more
quickly this way by being able to see everything at a glance.
The only thing about hanging nice garments
are the pointed shoulders that the traditional
hangers leave on your clothes.
So I decided that I needed to make some padded hangers.
BTW, all of my padded hangers will co-ordinate with my clothes!
Hee, Hee, Hee.
Total costs to make these padded hangers was $ 0.60 each.
The only thing I had to purchase was the wooden hangers.
I was able to find 5 hangers for $2.97 at Walmart.
I used to do a lot of quilt making and still have a
ton of material and batting to use. It only made
sense to make them instead of buying, plus I get
a sense of pride knowing that I made something
that is not only functional but beautiful as well.

This is how I made my padded hangers.
As I stated above, I purchased unfinished wooden
hangers from Walmart and removed the wooden
dowel rod. I was pleasantly surprised that these
dowel rods were nailed in, instead of being glued.
Don't throw away those dowel rods!
We are going to be using them in our garden to stake up our plants.
See, there I go again saving money.
Next up, adding the padding to the hanger.
I cut my batting 23"L x 18"W, I wanted a nice thick padding.
Measure one side of the hanger and add an additional 1 inch
to cover the ends, multiply that number by 2. This will be your length.
Fold the batting in half lengthwise, and then fold in half 1 more time.
You should have 4 thicknesses of batting.
Using a sharp pointed instrument, I used and awl, poke a hole in the center
of the batting. Place the hanger through the center hole.
Wrap the batting around the hanger and staple the upper part of
batting in place using a staple gun.
Continue wrapping the batting around the hanger and pin in place.
Stitch the batting in place using a large basting stitch.
Your stitches don't have to be perfect as this will be getting covered.
Stitch the ends closed. You don't want the batting to
slide up the hanger when you add your sleeve.
Create a pattern for the sleeve.
Lay your padded hanger on top of a piece of cardstock or cardboard.
Trace around one half of the hanger adding an additional 1/2" for
seam allowances. Cut out your pattern piece.
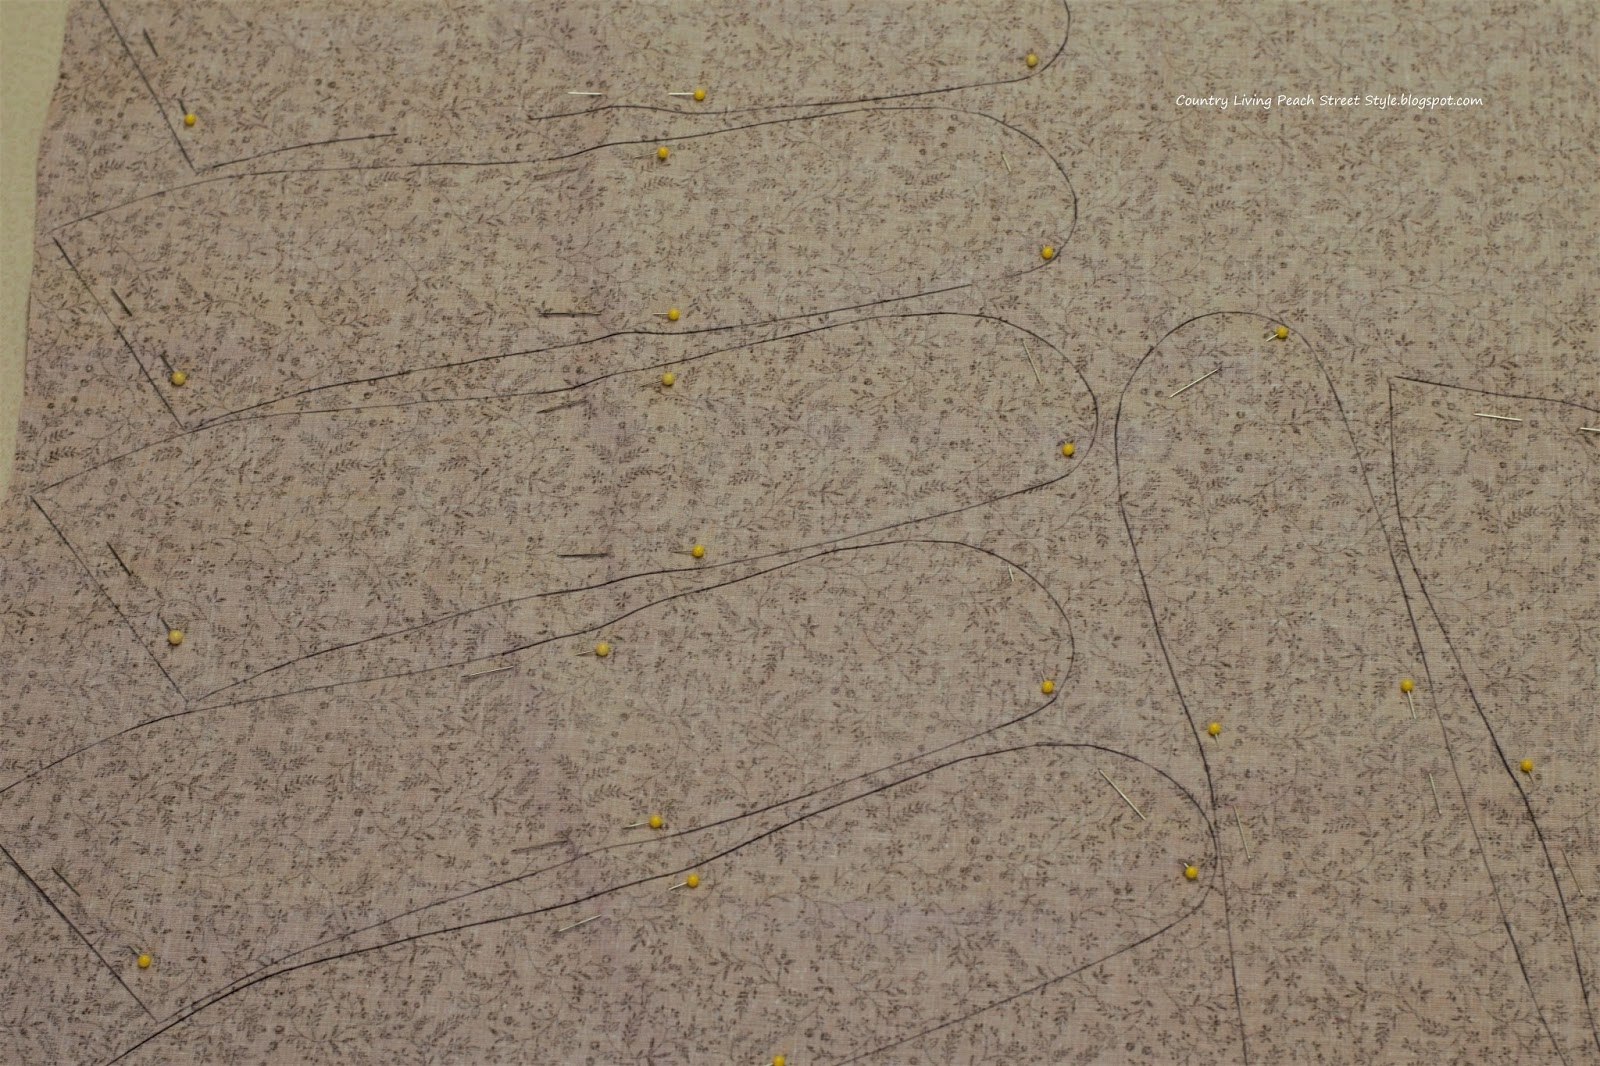
Choose your fabric and iron to make sure there are no wrinkles.
Fold the material in half with right sides together. Trace your
pattern piece onto the material using a ballpoint pen. Pin the
traced pattern pieces together and cut out.
You need 2 sets of patterns per hanger.
Using a sewing machine, stitch around the pattern piece leaving
the square end open. Trim off excess.
Turn the sleeve right side out and iron flat.
Place the sleeve onto the hanger.
Turn under the raw edges and stitch together. Don't worry if
your stitches show or the edges don't line up perfectly.
Cut a length of ribbon approx. 28". I used 1/4" satin ribbon.
Wrap around the hanger handle and cross in front.
Wrap the ribbon around the back and bring back around to the front.
Tie a bow. I found that it was easier to turn the hanger away
from you and then tie the bow. This way the ends
of the bow will hang the right way.
Trim the ends of the ribbon.
Your new padded hanger is now ready to use!
I'm in the process a making these with 4 different fabrics.
The most time consuming part of making these is adding
the batting to the hanger. Once you have that part done
the rest goes rather quickly.
Check back in next week and I will give you a
tour of our Master closet.
That's it for this week.
I'm off to make some more padded hangers!

Until Next Time,
Veronica


Sunday, January 22, 2017

Two Months

I can't believe it has been a little over 2 months
since our little Grandlove was born.
It is amazing how quickly they grow and change.
He has a little scratch on his face from his
fingernails. Mom has a hard time keeping up
with them they grow so fast.

Yesterday we went to visit him
and did lots of cuddling & loving.

Sharing time with Grandpa.
Grandpa sure loves holding him.
Love kissing those cheeks!
Watching a football game with Grandpa.
His little arms and legs are in constant motion.
Getting some lovin from Nonnie.
He was so focused on what Grandpa was doing.
Oooh, what's Grandpa doing?
You have to be quick to capture a smile.
He was so happy he couldn't sit still.
I was able to snap the end of a smile though.
Tummy time to build up the neck muscles.
He is able to hold his head up for longer periods.
We were having quite the conversation.

Getting to be nap time.
Watching football tends to do this.
But I don't want Nonnie and Grandpa to go!
We so enjoyed our visit and can't
wait until next time.

That's it for this week.
Until Next Time,
Veronica

Sunday, January 8, 2017

Wholesome and Hearty Pot Roast

Yesterday was a bit deceiving around here.
The sun was shining brightly and the sky
was a beautiful blue, but boy was it cold!
We only reached a high of 6 degrees. Brrrrrr.
But we braved the elements and headed
out to run a few errands.
This morning when I woke up it was -4!
Can you say double brrrrrr.
With the weather being so cold the past few
days today called for a wholesome and hearty meal
for dinner to warm our bellies.
I love to fill the house with wonderful smells
and this pot roast is one of my favorite things to smell.
I will put this together and throw everything
into the slow cooker and let it cook all day long.
It doesn't take long for the wonderful
aromas to waft through the house.
A pot roast is one of the easiest meals to put together.
With just a few simple ingredients you will have
a meal made in no time flat.
Don't believe me?
I'll show you just how easy it is.

Start with a few wholesome ingredients, such as,
onions, whole carrots and red potatoes with skins attached.
A chuck roast (obviously), extra virgin olive oil,
salt, fresh ground black pepper,
beef broth, red wine (optional), fresh rosemary & thyme.
Before starting prepare the vegetables.
Clean the potatoes and carrots and leave the skins on.
Cut the potatoes in half and set aside.
Cut the ends off the carrots and cut into 2-3 inch pieces, set aside in a separate dish.
Peel the onions and quarter, set aside.
Generously salt and pepper the chuck roast on all sides and set aside.

Now let's seal in those flavors!

Heat 2-3 tablespoons of EVOO in a large skillet on medium high heat.
Place the quartered onions in the hot skillet and cook until nicely caramelized.
Remove the onions from the skillet and set aside.
Do the same for the carrots.
Place the halved potatoes into the skillet face down and lightly brown.
Remove the potatoes from the skillet and set aside.
Last to go into the skillet is the chuck roast. You can add more olive oil if needed.
Quickly sear the roast on all sides.
You want to seal in all of those wonderful juices.
Remove the roast from the skillet and place into the slow cooker.
Add about 1 cup of beef broth to the skillet and scrap all of the bits and pieces from the bottom of the skillet. Add this to the slow cooker with the roast. (Sorry, no picture of this step).
Add an additional 2 cups of beef broth and 1 cup of red wine into the slow cooker.
Place the carrots, potatoes and onions into the slow cooker.
Top with 2-3 sprigs of fresh rosemary, and 2-3 sprigs of fresh thyme.
Place the lid on and let it slow cook for 6-8 hours.

This is one of Hubby's favorite meals.
I tend to agree with Hubby on this one.
Doesn't it look DELISH?
You'll know when it's done because the roast will literally
fall apart and melt in your mouth.
Don't forget to add a little broth to your plate for added flavor.
Enjoy!

That's it for this week.
Until Next Time,
Veronica

Sunday, January 1, 2017

Creating A Spring Look

Happy New Year!

I love all the hustle and bustle of the holidays,
but once the new year rolls around I am so done with it.
The Christmas decor has been stored away for
another year and the house has been cleaned
and put back in order. Time to take a little
breather before I think about creating
anything new for our Spring decor.

Speaking of Spring, one of my co-workers asked
if I could create a unique birthday gift for a friend
with Spring colors.
She had seen pictures of my lantern
I dressed up for Christmas and fell
in love with it. She had never seen
anything like it before and ask if I could
possibly make one with spring colors.
I had her pick out a lantern.
This is the one she chose.

As for colors, she really didn't have a preference,
she left that up to me.

So I took this simple lantern and
dug through my flower stash and
ribbons, threw in a little of this,
and a little of that, and the simple little
black lantern went from simple...

...to simply STUNNING.
A beautiful Spring creation.

Here is a closer look.
Doesn't this little bird add just the right touch of Spring?
And how about a butterfly and some pussy willows?
Hubby walked in when I had just finished it and
his comment was, "Wow, that's impressive."
I'm glad he approved.
I'm pretty confident that my co-worker is going
to love it too.

It truly is STUNNING.
This one is going to be hard for me to part with.

That's it for this week.

Until Next Time,
Veronica