Wednesday, December 24, 2014

Merry Christmas

I finally have the last of the Christmas projects completed for this year!
Christmas will come and go but I will continue to work
on Christmas projects for next year.  The Christmas project
list is just too long to wait until November to start on it, and
I'm sure that the list will get longer as the year goes on.
 
This is another pillow cover that I hand painted.
 
 
And these are the side pillow covers I made to go with it.
 
 
I made my Christmas pillow covers in the same colors so that
I could mix and match them. 
(plus they match my out dated couches,
which I'm debating reupholstering myself.)


From our home to yours
Have a Very Merry Christmas!
 
 
Veronica


Sunday, December 21, 2014

Joy to the World

As we are getting closer to Christmas, my
Christmas projects are winding down.
 
I wanted to make a couple of Christmas pillow covers that could be
used after Christmas as well.
 
I saw these Poinsettia pillows from Pottery Barn a couple
of years ago and really liked them.  I knew that I could make these
for way cheaper than what they wanted for them.
 
 
Pottery Barn
 
I wanted my poinsettias to be red on a neutral background.
This is my take on Pottery Barn's poinsettia pillow.
 
 
These pillows were super easy to make!
 
I made a petal shape in 3 sizes.
Cut out 5 of each shape using felt.
 Baste stitched a line down the center
of each petal and pulled the thread to make the petal have a scrunched look.
Hot glued each petal onto the pillow cover.
Hot glued the silver bells in the center.
 
I made 2 pillow covers and placed them on the couch.
 
The couch didn't look completely dressed for the holidays.  The
center looked a little bare.  I think it needed another pillow and a throw.
I knew that I wanted a pillow with some kind of saying on it for the center of the couch.
So off to the craft room I go to create a center pillow.
 
I never hand painted on material before so I thought I would give it a try.
 
This is the design that I created and hand painted to make a center pillow.
The throw I bought from Joann Fabric for 50% off!


First I made my pillow cover.
Then I created my design using my Silhouette Cameo machine.  I printed off my design
and traced it on my material using carbon paper.  Next I hand painted my traced design.
DONE!
Simple, quick and easy.
 
Here they are displayed on the family room couch.
The angle I took this picture makes the poinsettia pillows look funny.  They really don't look like
that on the couch.  They look like the first picture I showed of the pillow.
 
 
DIY projects really do help you decorate your home for very few dollars.
 
I have one more post before Christmas and that will be the last of the Christmas projects
for this year.  I already have lots planned for next year!
So stay tuned.
 
Happy Holidays!
Veronica


Monday, December 15, 2014

Deck the Halls

Only 11 days until Christmas!
 
Are you ready for Christmas?
 
Are your Christmas cards in the mail?
 
Is your Holiday baking done?

Is your Christmas tree up and decorated?
 
Do you have your Christmas shopping done?
 
Are the presents wrapped and under the tree?
 
Is your home ready to receive guests?
 
Have you "Decked the Halls"?
 
How is your stress level?

Oh the hustle and bustle of Christmas!
 
This year I decided to go easy on decorating the house for Christmas.
I just wanted a few very simple, no fuss, displays.

And as far as holiday baking goes, it just wouldn't seem like Christmas without making Nana's frosted sugar cookies.  Which by the way are completely gone!
10 dozen cookies, GONE!

 
I don't get fancy decorating the cookies because a certain someone (not mentioning any names Hubby) can't wait for them to get frosted.
 
So come on in and take a tour of our holiday home.
 
 
I really wanted to put greenery on the railing but our cat loves to chew on it.
 
 
Our Christmas tree.
I can't place the wrapped presents under the tree because our cat will chew on those also!
At least she doesn't climb the tree!
 
 
A simple display on the coffee table in the living room.
 
 
I did the mantel the same as last year because I liked the look so much.
 

Next we step into the kitchen.

The Hot Chocolate Bar has been simply set up.

 
The Secretary has been dressed up and the songs on Nana's clock have been changed to
play Christmas music.  This clock plays a short song every hour.
 
 
Even the trash bin gets a touch of Christmas.


Just a few simple displays have been set up in the dining room.
 
 
This display is on our dining room hutch.
Next year I'm hoping to decorate the inside of the hutch.
 
 
The Nativity has been set up on the pie safe.
 
 
That's it for our holiday home tour.
I'm trying to finish up one final Christmas project.  Hopefully, I will have it done
to show off next week.
 
Until next time,
Veronica


Sunday, December 7, 2014

Ho, Ho, Ho

I bet you can't wait to see what I came up with.
Am I right?
 
Remember my Thanksgiving wreath?
 
 
I was shopping at Michael's one day and they had just put
out their Christmas ribbons and it was already on sale!
So being the ribbon junkie that I am, I had to check it out.
I noticed this ribbon with Santa on it and immediately thought
of our Son.  He likes anything Santa.
 
 
So of course I just had to buy it!  I knew that I would use it eventually, plus it
was on sale for 1/2 price!  I just can't pass up ribbon for 1/2 price!
 Somehow a few other spools just happened to jump into the cart as well!
Funny how that happens.
 
Our Son and DIL liked my Thanksgiving wreath.
So I decided I was going to make a Christmas wreath
for them and incorporate the Santa ribbon into it.
 
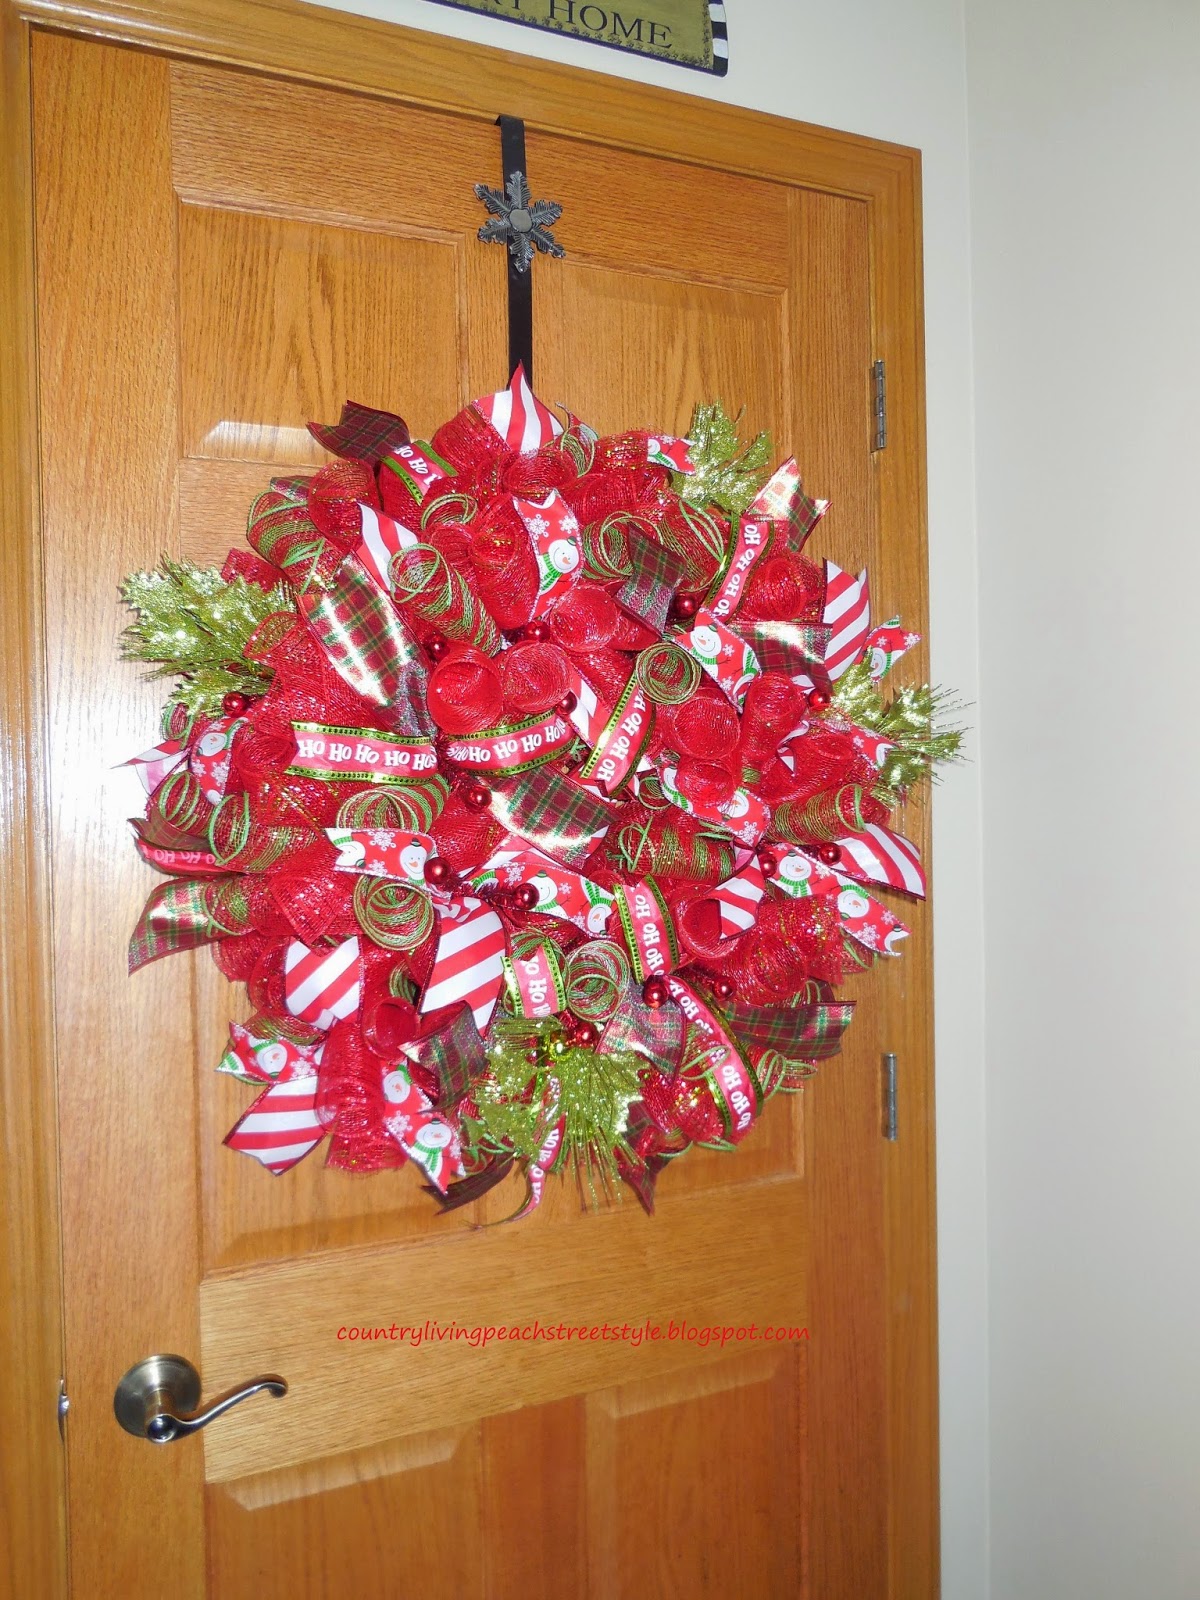
The base of the wreath was started with this plain red colored mesh.
 
Once I got it all on it just looked too plain.
So I added 2 more different red colored mesh.


It was starting to look pretty good at this point.
 
Then I started to add the ribbons and embellishments.
 
Boy, did that make a difference!
 
It went from being plain to
WOW!
 
 
It was hard to get a good picture of this wreath because it has so much sparkle!
But it doesn't look gaudy by any means.
This wreath is HUGH!  It's 25" by 25" by 9" deep!
I love ribbon so much that I used 14 yards on this wreath!
 
Here is a side view so that you can see just how deep it is.
 
 
Notice all the sparkle?  The picture looks distorted because of the sparkle!
 
Here is a close up view.
 
 
This wreath is so full and thick.  It really does have that "WOW" factor!
 
Here is one more view.
 
 
It is so FESTIVE looking!
 
I gave it to our Son and DIL and they REALLY, REALLY,  liked it.
Katie said it was very "FESTIVE" looking!
Great minds do think alike!
They were already trying to decide where they were going to hang it.
 
I liked this one SO MUCH that I decided to make us one.
Because I like snowmen, I used snowman ribbon on ours.
 
 
There's something about snowmen that just brings a smile to your face!
 
This is our wreath.
 
 
A side view.
 
 
An angled view.
 
 
And one final view.
 
 
These wreaths are truly SPECTACULAR!
 
Now I need to get busy and "Deck the Halls"!
 
See you next week,
Veronica