Sunday, May 31, 2015

Eight is Enough

Did you enjoy my Thumbprint pillows tutorial?
 
 
I wanted to add one more design to go along with these two, but I didn't want to do the thumbprint again.  Instead I chose to draw and paint a design onto my pillow cover.  Let me just say this.  I AM IN NO WAY AN ARTIST.  I couldn't draw a straight line if my life depended on it.  But I knew that I would be able to do this because I have a little cheat method that I use.  If I can do this, so can you! No special skills required.  Stay with me and I will show you how easy it is to transfer an image onto material to paint.
 
First, choose your fabric and lay it on a flat surface.
 
 
Choose an image that you would like to transfer.  I chose an octopus to go along with my seahorse and starfish.  Print it out or make a copy of it.  I enlarged my image and pieced it together to fit my pillow cover.  Place your image onto your fabric and tape the top of the image onto the fabric.
 
 
This is my cheat method.  Good old CARBON PAPER!  Place the carbon paper under your image, being careful not to move your image.
 
 
Grab a ball point pen and carefully trace your image using gentle pressure. 
 
 
Your image should look like this.  If you get a little oops like I did don't worry it will wash out.
Your now ready to paint your image. 
 
 
Here is my image after I was done painting it.  The camera makes it look like it is splotchy, it's not though.  Although I liked it how it was, I thought that my octopus needed a little personality.
 
 
So I gave him a face.  Ah, much better!
 
 
I knew that the carbon paper wouldn't show up on my dark paint, so I used this to transfer my face image.  I've had this stuff for YEARS!  I used the white sheet and did the same as I did using the carbon paper.


I didn't have a small stiff paint brush to paint his face or his little suckers, (yes, that's what they're called), so I used a round toothpick.  I just dipped the toothpick in the paint and used it like a paint brush.  It's all about improvising and being creative!
 
 
I couldn't wait to get my octopus pillow done so that I could add it to my starfish and seahorse pillows.  Here they are!


I guess all of those paint-by-numbers that I did as a kid really paid off!  I LOVE my little seaside themed pillow covers!
 
Here is a close up of my octopus pillow cover.
 
 
That's it for this week.  Enjoy your week.
 
Until Next Time,
Veronica


Sunday, May 24, 2015

Thumbprint Pillows

Summer is fast approaching!
Can you believe that it is almost the end of the school year?
Before you know it those kiddos will be saying "I'm Bored".
So I thought that I would post an easy project that the kiddos would enjoy helping make.
 
Thumbprint Pillows
 
 
These really are super easy to make.
 
All you need are a few supplies.
 
Fabric Paint - I used 3 different colors
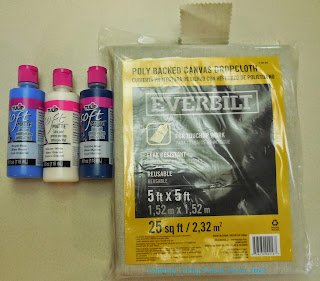
Pillow Cover - I made my own using a painter's dropcloth
*Hobby Lobby sells plain pillow covers with a zipper closure that can easily be decorated*
 
 
Clear Contact Paper - I purchased mine from Walmart
 
 
Wax Paper
Scissors
Design of choice
 
Let's get started!
 
First, chose a silhouette design from the internet for your pillow cover and print it off.  I enlarged mine to 140% and taped it together.
 
 
Place your design onto a big piece of contact paper and tape it down.  Very carefully cut out your image.
 
 
Once the design is completely cut out, peel the backing off the contact paper and place the design onto the pillow cover, making sure that it is centered and firmly pressed down to prevent paint from seeping through.  Place a piece of wax paper between the pillow layers.  This will prevent the paint from soaking through.
 
 
Now the fun begins!  Gather the kiddos and the paint.  Place the paints onto paper plates and let the kiddos dip their thumbs into the paint and start randomly filling in the design.  No need to wait for each color to dry before adding the next color.
 
This is what it looks like with the first color.
 
 
Continue adding your colors until the design is completely filled.  I let mine dry about 10 minutes before I carefully removed the contact paper.  Here is my design with the 3 colors added.


Let dry for 4 hours before using your newly designed pillow covers.  I made a thumbprint seahorse and starfish pillows.  I also made the matching pillow.


Here they are on the back porch.
 
 
Your kiddos will LOVE making these.  Wouldn't these make great personalized gifts for those special people in their lives?
 
So go create some fun memories together with the kiddos!
 
Until next time,
Veronica
 

Sunday, May 17, 2015

Herbs

I've made another change in the kitchen.
 
Imagine that, me making changes!
 
Hubby says that I am forever changing things.
 
Isn't that what life is all about?  Change.
 
He likes to have everything stay the same FOREVER!
 
I for one LOVE change.  Plus it gives me a reason to be creative!

Since I created my chalkboard in the kitchen I wanted to lighten things up a bit in the kitchen. But I wasn't quite sure just what I wanted to do, until I noticed my little herb garden on our kitchen window sill.

 
I was getting tired of the dark rooster pictures I had hanging in the kitchen.

 
I had already taken these down and realized I deleted my picture of them hanging on the kitchen wall.  I pulled these out of the closet and snapped a quick picture.  Please ignore my reflection in the pictures.

I replaced my rooster pictures with 3 pictures of my most used herbs.  It's hard to get a good picture in our kitchen because the lighting is not the greatest, but you get the idea.

Parsley

Rosemary
 
and...
Thyme.
 
Here is how I created my herb pictures.
 
I purchased 3 inexpensive frames from Walmart.
 
 
I then took them apart and painted the frame with acrylic paint in Robin's Egg Blue.
 
 
I found 3 herb pictures from Graphic Fairies and printed them onto good cardstock. Place them inside the frame and I was done.
 
Here is a before and after picture.
 
 
And here they are on our kitchen wall, bad lighting and all.
 
 
I'm very happy how these turned out.  The lighting makes these look like they are wrinkled. No wrinkles in these prints!  They truly look like professional prints.  Hubby likes the lighter look also in the kitchen.  I always run my ideas by him but It's hard for him to vision them.  I knew that he would come around once he saw the final results!
 
That's it for this week.
 
Make sure you check in next week.  I have a fun project that the kids can get involved in also.
 
Until next time,
Veronica


Sunday, May 10, 2015

How to Organize and Style a Cork board

I'm the type of person who likes to have
everything neat and orderly with
a sense of style.
 
So when our cork board was getting out of control,
it was time to step in and clean it up!
 
This is how bad our cork board had gotten.
 
 
It was hard to try and find what you were looking for.
There were things hiding underneath of things!
It was a MESS!
 
Let's get organized!
 
First, remove everything from your cork board and sort it out.
You want to start with a clean slate.


I purchased some burlap with a design on it to give our cork board a little style.
 
 
Measure your cork board.  Our cork board is 17" x  23".
If you plan on using material, cut your material 4" wider and longer than your cork board.
I cut ours 21" x 27".
Working on a smooth surface,  lay your material right side down with your
corkboard facing down and centered onto your material. Sorry I forgot to take a picture of this.
 
Wrap your material around the backside of the cork board and staple into place using a staple
gun, making sure to pull your material tight as you go.  Work the top, bottom, and side first before
working the corners.  Once you have the 4 sides completely stapled into place, grab a corner
and pull down tight toward the center and staple into place.
 
 
Flip it over and your ready to get organized.
 
I purchased a few chalkboard label from Hobby Lobby to organize mine.
 
 
In order to hang them on the cork board, I added a thumb tack to the clothespin
using my hot glue gun.
 
 
I found this container to use also.
 
 
This is what our new styled and organized cork board looks like now.
 
 
So Much Better!
 
That's it for this week.
 
Until Next Time,
Veronica


Sunday, May 3, 2015

All About H.O.M.E.

Today's post is all about home. 
 
Last week I promised that I would show you how I made my HOME letters that I placed beside my chalkboard.


But before I do, I wanted to share what Hubby has been up to.  Our shrubs in the front of our house were starting to look a little sparse and scraggly.  It was time to replace them.  This is a picture that was taken in the Fall.
 
 
Yesterday Hubby dug out the old shrubs, the ones under the window, and replaced them with 4 Boxwood shrub, and also put down new mulch around the entire house.  Our curb appeal is so much better now.  These Boxwood will fill in the area under the window nicely.
 
 
Everything is starting to green up and bloom around here.  This is our Magnolia tree in our backyard.
 
 
We got our first Hummingbird this morning!  It's always good to see them.  It means warmer weather!  It's 4:00p.m. and is 81 degrees and breezy here today.  We have all of our doors and windows open and sat and drank our morning cup of coffee on the back porch!  Life is good!
 
 
Let's get back to how I made my HOME letters.  I knew that I wanted to have the word HOME beside my chalkboard.  I thought that I would purchase some unfinished wood letters that I could paint and hang.  I looked at a couple of different craft stores and just could not find what I wanted.  I was looking for something with a little depth to it.  All of the wooden letters that I could find were only about 1/4 inch thick and either too small or too big.  Not what I was looking for.  Then I found these at Hobby Lobby which were the perfect size!  They measure 8 1/4" L x 5 1/4" W x 1" D, are very lightweight and don't need nails to hang them.  Cardboard letters!  I got each letter on sale for $1.49!  Regular price is $2.99 each.  Gotta love a sale!
 
 
I dug out my craft chalkboard paint and got to work painting them.  It only took me 1/2 hour to paint all 4 letters.
 
After they were dry, which only took a couple of minutes, I was ready to hang them.  I used this to hang them.  Tacky Putty.  This is strong enough to hold these letters, will not damage your paint, leave any kind of residue on your walls, plus you don't need nails to hang them.  Hubby liked the idea about no more nail holes in the wall!
 
 
Simply break a piece off and push onto the back of the letters in various places.
 
 
Place onto your wall, adding a little pressure to secure into place.
 
 
I didn't even do any measurements to hang these.  I just eyeballed them and made adjustments as needed.  That's the good thing about this Tacky Putty.  You can make adjustments very easily and quickly.  Simply remove from the wall and reposition as needed.  No extra putty required.  This project cost me under $10.00 to make!  No one will ever know that these letters aren't made from wood!  This was a very quick, simple and inexpensive home décor project that adds a casual touch of style.
 
 
That's it for this week.  I'm off to work on my next project.
 
Until Next Time,
Veronica