Monday, December 26, 2016

Hamming It Up

Our preferred choice of meat for
Christmas dinner is a nice baked ham.

I quick snapped this picture of our
ham as I pulled it out of the oven.
I bought a simple hickory smoked ham
and made a Honey glaze for the topping.
Hubby couldn't wait to sink his teeth into this,
nor could the rest of us for that matter.
The smell from this ham cooking was unbelievably amazing!
Hubby kept commenting that it smelled like a BBQ smokehouse restaurant.
Our mouths were salivating!
When our Son arrived and got his first smell of this
ham cooking you could see the hunger in his eyes.
He immediately headed for the kitchen to try and
sneak a piece of ham, but he came up empty handed as it
hadn't been carved yet.

Each of the dinner plates were dressed for
Christmas dinner.
Double sided napkins that I made a few years ago
were folded into Christmas trees.
Each napkin took about 2 minutes to fold.
To unfold the napkin to use, simply grab the top
of the tree and give it a shake.
Dinner was a HUGE success.
Everyone walked away from the table stuffed!
The ham took center stage,
it was so incredibly good tasting,
juicy, smoky, sweet flavor....
 perfection at it's best!

I usually cook enough food so our
Son & DIL always get to take home
lots of leftovers.
I made sure I saved enough of this ham
so we could have another meal, or two, from it.
This ham was go good there was no way I
was sending it all home with Sonny!
Sorry Sonny.
I promise I'll make another one for Easter dinner.
That's all for this week.
Until Next Time,
Veronica

Sunday, December 25, 2016

The Greatest Gift

This year we celebrated Christmas on Christmas Eve.
Today will be a day of lounging in our jammies all day
and doing very little.

I just wanted to pop in to share
a little of our Christmas Cheer with all of you.
No fancy bows or packaging needed.
He is the greatest gift we have
ever received from our Son & DIL!
He has already changed so much since we last saw him.
He is more alert, active, and can now focus
and follow you with his eyes.
His little arms and legs are in constant motion.
He was trying so hard to talk to us.
He is such a good baby, just like his Daddy was.
The only time he is fussy is when he is hungry.
He looks so much like his Daddy.
This is a picture of his Daddy when he was 1 day old.
We call this his Pirate face.
He loves to make this face...
aargh Matey.
He has captured our hearts.
Check back in tomorrow as I will have another quick post.
Have a Blessed and Merry Christmas.

Veronica

Tuesday, December 20, 2016

Christmas Eggnog

Are you an Eggnog drinker?

Do you buy Eggnog from the grocery store?
I'm here to tell you to STOP.
Quit buying artificial, sickening sweet, tasting eggnog.

The real deal is so easy to make and
literally takes about 15 minutes.

And the taste.....Oh the taste.
It is rich and creamy with a touch of sweetness.
Store bought eggnog doesn't even come close to this!
Because this is my go to recipe for the best tasting Eggnog
I knew that I had to share it with you.

This recipe was created by Alton Brown, from the Food Network.

Eggnog

Ingredients:

4 egg yolks
1/3 cup sugar, plus 1 tablespoon
16 oz. whole milk
1 cup heavy cream
3 ounces bourbon (optional)       (I personally prefer the bourbon added)
1 teaspoon freshly grated nutmeg
4 egg whites

Directions:

In the bowl of a stand mixer, beat the egg yolks until they are lighten in color. Gradually add the
1/3 cup of sugar and continue to beat until it is completely dissolved.

Add the milk, cream, bourbon and nutmeg and stir to combine.

Place the egg whites in a separate bowl and beat to soft peaks. With the mixer still running gradually add the 1 tablespoon of sugar and beat until stiff peaks form.

Whisk the egg whites into the egg yolk mixture.  Chill and serve.

*Whisk the mixture to blend before pouring into glasses.  Yields: 6-7 cups

Here's toasting to prosperity and health.

Veronica

Monday, December 19, 2016

Baby It's Cold Outside

Are you staying warm where you are?

When I got up this a.m. at 7:30
it was -9 degrees!

Old man winter has arrived
with a vengeance.

Between Friday & Saturday we
received 6 inches of snow.

We are used to the cold and snow
around here and try to make the most of it.

When I walked out into the kitchen
this is what I was greeted with.
It made me smile and laugh and set my mood for the day.
I just had to share it with you.
Hopefully it will bring a smile to your face also.

Hubby is the BEST!

Check back in tomorrow as I have another post
you won't want to miss.

Until Then,
stay warm my friends.
Veronica

Sunday, December 18, 2016

A Trio of Trees

Can you believe that Christmas is
a week away?
How is that possible?
I still have a ton of things
to do yet!

The hustle and bustle of the holiday
season usually brings on the stress levels.
Whenever I feel my stress levels starting
to take over my emotions, that's when
I know that it's time to step away
from everything and create a craft.
Crafting is my go to de-stressor.

I've seen these little birch bark trees
popping up all over blogland and loved
them instantly.  I went looking for them
in the stores and couldn't find any.
So I put on my thinking cap and created my own version.
I made mine from poster board and cardstock.
I placed one by our Nativity...
and two on top of our Secretary in the kitchen.
Costs to make these. $0.

Here's how I made them.

Using poster board I first create a few cone shapes.
You can easily use store bought cones to make these.
Next, I created a shape for the boughs of the tree
and traced them onto kraft colored cardstock
and cut out the shapes.
I wasn't worried about getting the ends perfectly rounded.
If you don't have cardstock, old cereal boxes would work great.
My largest tree measure 12 inches tall.
I used 5 sheets of 8 1/2" x 11" cardstock for the 12" tree.
Once your boughs are cut out it's time to apply them onto
the cone shape.  Using a hot glue gun,run a line of hot
glue at the straight end of the bough and place it onto
the base of the cone shape. I left about a 1/2" overhang.

Continue applying the boughs around the entire base
of the cone shape, overlapping the boughs as you go. 
Once you have your first row complete it should look like this.
Continue adding rows until you have completely covered
the entire cone shape, overlapping and staggering each row as you go.
When completed your tree should look like this.
The trees looked a little plain as they were,
so using an artist brush and some white craft
paint I roughly painted on some snow.
While the tree was still wet, I lifted each of the
boughs with my fingers to curl the ends and give
the tree some dimension.
I loved them so much I ended up make a set for our Sonny.
And the best part about making these trees,
other than the fact they cost me 0 dollars to make....
It alleviated my stress level!
And that makes me very happy!

That's it for this week.

From Our home to Yours,
have a Very Merry Christmas!

Veronica

Sunday, December 4, 2016

Touches of Christmas

This year I decided that I was only
going to add a few touches of
Christmas to our home,
a few to me could mean a lot to you.
I decided that I kind of like
the less is more attitude this year.
I don't know about all of you
but this year has really flown by.
I can't believe that we are into
the month of December already!
I was so not ready for December.
Lucky for me, the few projects that
I wanted to make didn't take much time to put together.
We are expected to get our first snowfall
today, 3-5 inches. As I am typing this it has
been snowing steady for a few hours now.
Maybe that will get me into a more festive mood.
I promised you that I would show you our Christmas tree,
so sit back and kick up your feet with a hot beverage in your
hand and enjoy our tour of our Holiday home, as there are
lots of pictures.
So let's get this tour started.

Our tree this year was decorated around this
Top Hat that I made to use as our tree topper.
I love the traditional colors of red, green, gold, white and silver for Christmas.
This was a quickly taken picture and doesn't show the
true colors of the Top Hat.
I also made one for our Son and DIL. Here they are side by side.
Next week I will do a quick tutorial on how to make these.
Here is a close up of the Top Hat on the top of the tree.
These are the true colors.
A view looking from the dining room/office into the family room,
and here is the full view.
Our tree stands 7 1/2 feet tall and requires
a 60 inch tree skirt.  I wanted a more red
tree skirt this year and I finally found one
at Home Goods.
I didn't put as many decorations on the tree as previous years.


A simple arrangement on the coffee table.
While walking around Hobby Lobby one day, I came
across this Top Hat.  I bought two of them and decorated
them for the mantle.  All I did was turned them upside down
and placed a few greenery and berry twigs inside. A simple
arrangement to anchor on each end of the mantle.
A very simple looking mantle put together this year.
For the center of the mantle I created a simple sign from a scrap piece
of hardboard sitting in the garage. This sign measure 29 inches by 8 1/2 inches.
A perfect size for our mantle.
And this years homemade ornament was made from a
big pine cone, which is hanging on our Curio cabinet.
Moving on into the dining room/office area.
I saw this Santa and fell in love with him.
I placed him on top of our pie safe along with
a few trees that I had from last year.
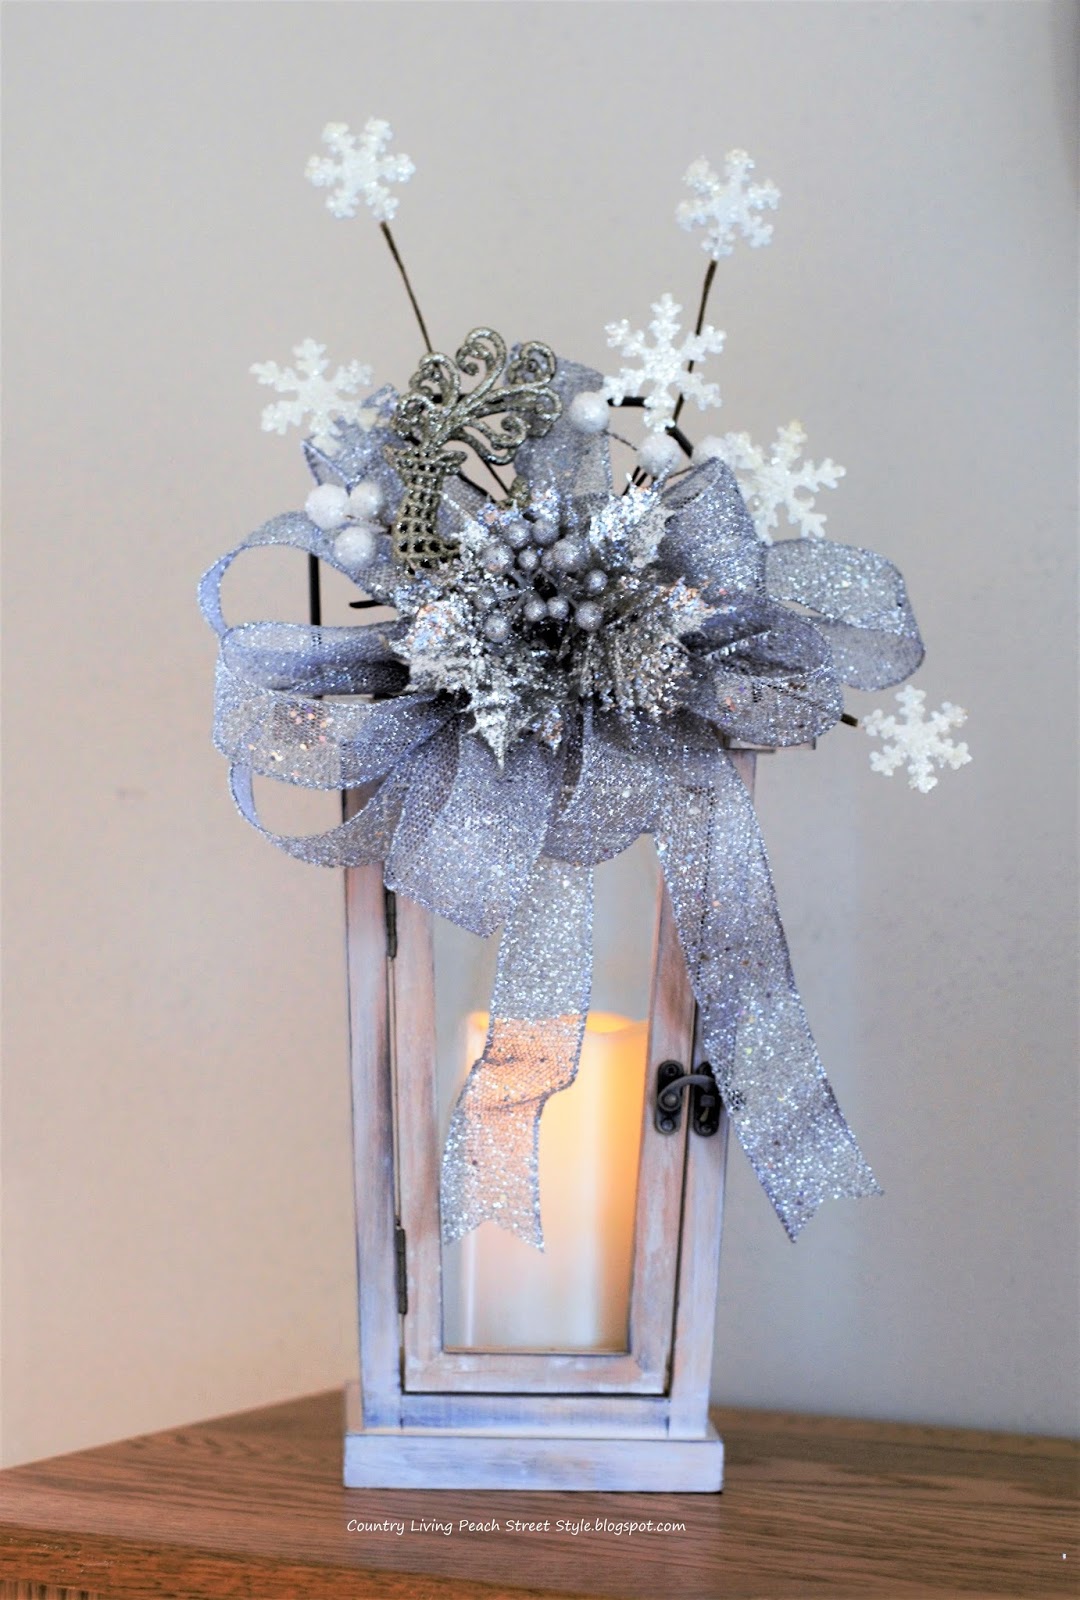
On the other end of the pie safe I decorated one of my
many lanterns.
I created a bow, then added a few embellishments to it.
Easy peasy and Oh So Beautiful.
And Santa needed a deer.
I found the perfect deer for him at Pier 1.

And I just couldn't pass up this handsome Buck that I found at Michael's.
Here is the completed arrangement of the pie safe.
I added a couple of ornaments that I made last year
onto the drawer fronts. I wish I could capture
how beautiful and magical this setting looks.
A close up of the top.
On the top of the country cupboard, I add the pine cone
Christmas tree and our Nativity set.
Next up the final room of the tour, the kitchen.
This is the wall that I am constantly changing,
which drives Hubby crazy.  All I did was
swap out the wreath and changed a couple of the plates.
The stand that currently sits below this arrangement was
all decked out for the Holidays.
Let's not forget about making the top of the
trash can festive. I added my old time truck with
a little bit of greenery tucked in the back. Throw
in a couple of ornaments, add a large pine cone
for a tree with a small ornament on the top and
you have a very simple holiday arrangement.
That completes our Holiday Home Tour.
I hope that I was able to give you some inspirations
if you were looking for some.

That's it for this week.
Stay warm!
Until Next Time,
Veronica