Sunday, March 12, 2017

In Like A Lion

February 24th brought us freezing rain
around these parts of the country.
Not fun driving home in that mess!
But it sure was beautiful on Saturday
with the sun shining on it all day.


Even though everything was coated with a thick
layer of ice it didn't stop us from seeing our Grandson!
He changes so much in between visits.
He has the most perfect heart-shaped lips!
He caught his first cold from daycare and was a
little tired so we didn't stay long to visit.
We let Daddy feed him and Mommy rocked him to sleep.
Finally, by Tuesday all of our snow and freezing rain
had melted.

Then BAM!

March 1st comes In Like A Lion!
We received 5 inches of snow.


When it was all said and done we had a beautiful winter wonderland.
 The the sun came out and made the snow nice and sparkly.
Our snow has since melted but the weatherman
has informed us that we can expect to receive
another 6-8 inches of snow tomorrow.

Spring, where are you!?

That's it for this week.
Until Next Time,
Veronica

Sunday, March 5, 2017

Accessorizing

I love to accessorize my outfits.
Whether it be with scarves, or with
a piece of jewelry, I just feel
more put together.

 A few years ago I was into making jewelry and
 made a few shorter necklaces that I really like.


I do like to wear long necklaces with my
outfits but I only own a couple that I bought years ago.

I have been trying to use up my numerous
craft making supplies and declutter our home.
I still had a bunch of jewelry making supplies
left so I thought why not dig out the supplies
and make some long necklaces?
I recently had a 3 day weekend and got
to work making long necklaces. I had
such a big stash of supplies left that I
was able to create 8 long necklaces!
Here are the ones I made with a close
up of each one.


I have a thing for hearts.


Long tassel necklaces are very popular
again this year. So I had to make one for myself.

I love that my necklaces and scarves coordinate
with my outfits.


As I wear my scarves and necklaces I will
try and post pictures so that you can
see how they look.
That's it for this week.
Until Next Time,
Veronica


Sunday, February 26, 2017

Love At First Bite

Are you a Peanut Butter Lover?
Have you ever had No Bake Peanut Butter Pie?
I happened to mention Peanut Butter pie at
work the other day and I got looks like I
had a third eye in the middle of my forehead.
Apparently, here in Wisconsin, they have never
heard of Peanut Butter pie!
I was asked if it was a joke.
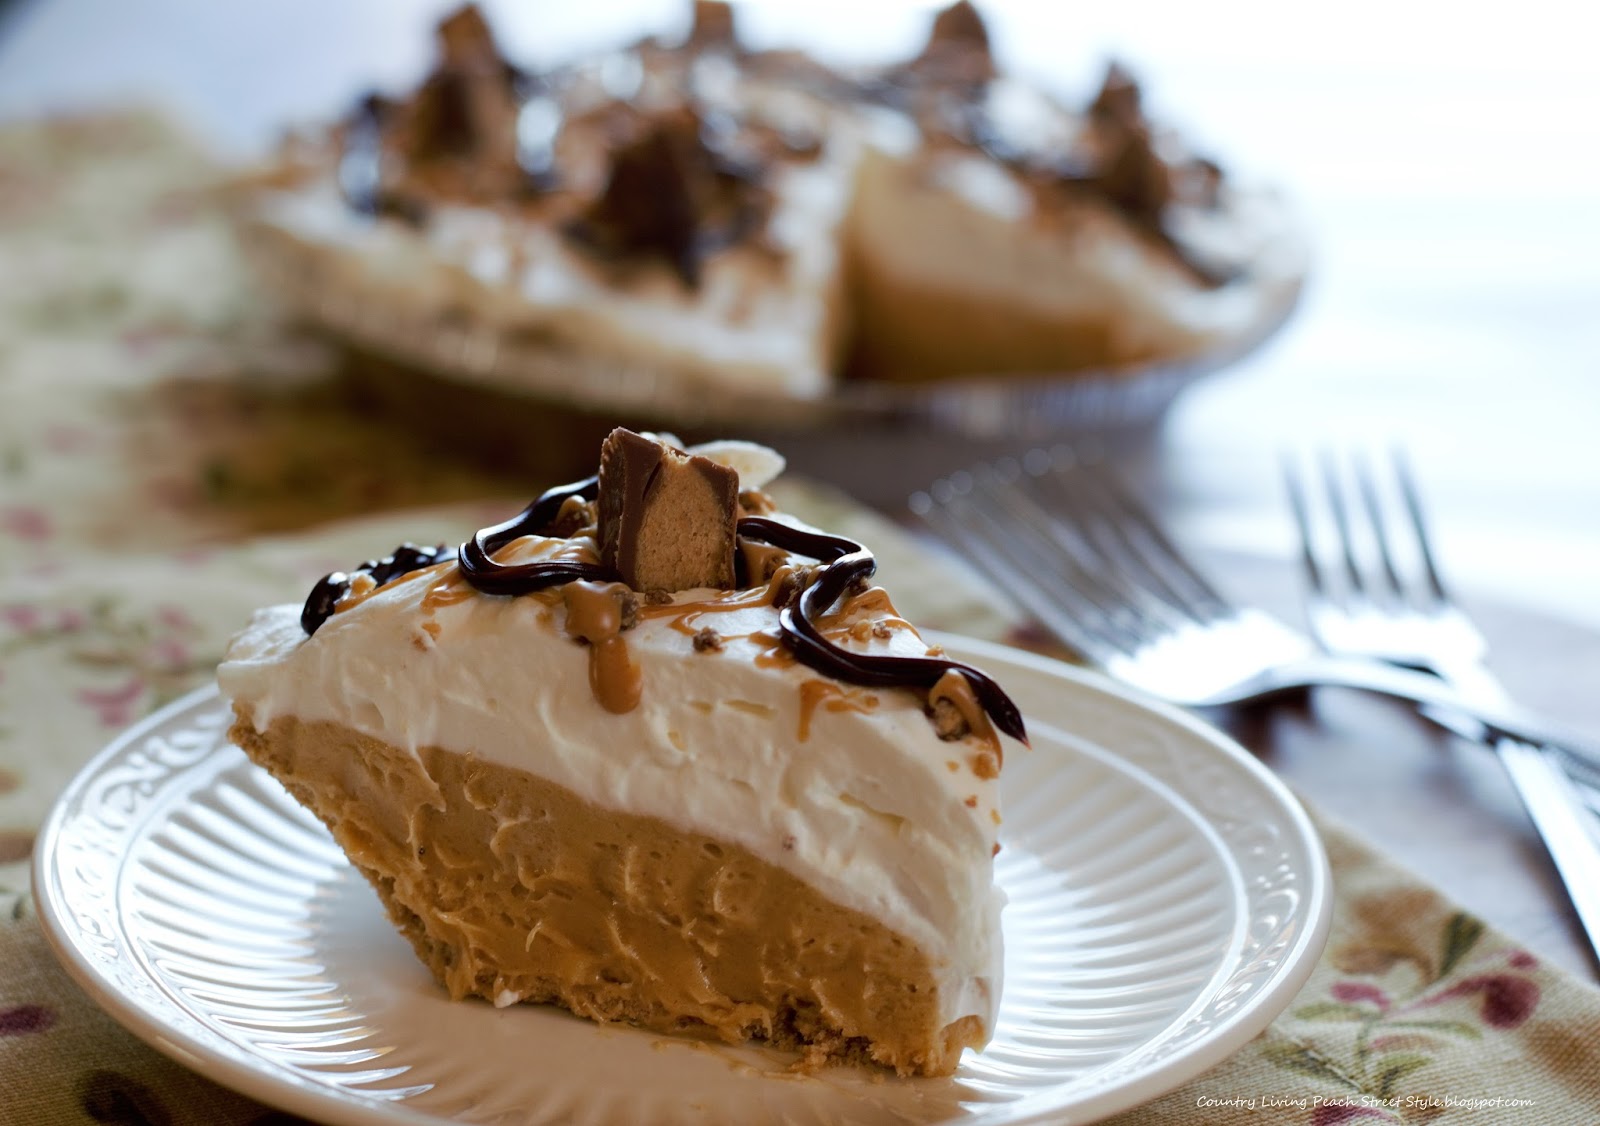
So to prove to them that indeed it was no joke, I made
2 Peanut Butter pies and took them to work to share.
Doesn't it look like it came straight from the Bakery?
I'm one of those people who will
grab a spoon and a jar of peanut butter
and eat it right out of the jar.
I know, it's so lady like, right?
Surely I'm not the only woman who does this, am I?
What's not to love about peanut butter?
Unless of course you are allergic to peanuts,
than I totally understand the dislike.
I was such a picky eater when I was growing up.
I HATED meat of any kind, but I
sure LOVED peanut butter and cheese.
Not together of course that would taste a little funky.
At least I was able to get my protein
from those two sources.

I will never forget the first time I had a
piece of homemade peanut butter pie.
I must have been about 11 or 12 years old.
One of my older brothers was dating a girl
and he brought her over to my parent's
house to introduce her to "the family".
She brought a homemade peanut butter
pie with her that she had made.
My ears sure perked up when I
heard her say Peanut Butter Pie.
I had never heard of a Peanut Butter Pie before.
My Mom was never a baker,
so the only pies that I had ever eaten were
the kind that you find in the freezer section
of your local grocer. Never made from scratch,
and never a peanut butter pie.
I couldn't wait to dig into this pie!
It wasn't fancy looking, just a graham cracker
crust filled with a peanut butter filling. It
didn't even have a topping on it.
But let me tell you, it was HEAVENLY.
It was Love At First Bite for this peanut butter loving girl!
Whenever I think about this Peanut Butter Pie I start
salivating like one of Pavlov's dogs!
And you all thought I was such a lady! Tsk.
I was so impressed with this pie that I
requested the recipe from her. I knew
that this pie was going to be with me
for the rest of my life. I'm so grateful that
she remembered to bring this recipe with
her the next time she visited because that
relationship didn't last long.
I still to this day have the original recipe that
she passed onto me, but as you can see, I have
tweaked the recipe a little. It still has the same
great taste as the original recipe, but better!

This pie is so incredibly easy to make and
literally takes minutes to put together.
It takes longer for the pie to "set up"
than it takes to put it together.
The presentation of this pie will have
people thinking that you picked it up from the Bakery.
And when you tell them that you made it, well they will
think that you spent hours in the kitchen preparing it.
Shhh, don't tell them any differently,
it will be our little secret!
Hubby and my FIL had never had, or heard, of
Peanut Butter pie until I came along. Now they
are both hooked on it. I have yet to meet a person
who has tried this pie and didn't like it. I can almost
guarantee that if you make this pie it will disappear quickly.
I also made one with a Chocolate Graham Cracker Crust.
Even though this recipe calls for cream cheese, don't worry
about the taste. You won't even notice it.

NO BAKE PEANUT BUTTER PIE

9-inch Graham Cracker Pie Crust

For the pie filling

1 (8 oz.) package Cream Cheese, softened
1 cup Creamy Peanut Butter
1 cup Confectioners' Sugar
1 (8 oz.) container Cool Whip

In a medium bowl beat the cream cheese and the peanut butter until fluffy. Add the confectioners' sugar and beat until fluffy again. Gently fold in 1/2 cup of the cool whip until just combined.

Pour the filling into the pie crust and spread evenly. Spread the remaining cool whip over the top.

Refrigerate for 2-4 hours, or until chilled and set up.

See, I told you it was super quick to make!
And the taste? SCRUMPDILLYICIOUS!

Did my co-workers like this pie? You BETCHA!
I brought 2 empty pie carriers home.
Uh Oh, I think I may have started something here!
It's one of those Good, Bad, things though.😉
That's it for this week.

Until Next Time,
Veronica


Sunday, February 19, 2017

A Baby Nest

Last week I was listening to the radio
and they were talking about a
Baby Box, and I realized that
I never wrote a post about the
Baby Nest I made for our Grandson.
When our DIL was pregnant I knew
that I wanted to make something portable
she could lay the baby in that would keep him safe
while she was busy doing tasks around the house.
So I started searching for baby beds
that I could make from material. That's when I discovered
these Swedish Baby Nests. I wasn't able to find any patterns
to purchase one to make though, so I created my own pattern.
To purchase one made was well over $100.00!
My cost to make one was $ZERO!
A little bit of sweat equity and a TON of LOVE is all it took.
This is the one I made for our Grandson using materials and
batting I already had in my stash.
I made one that is reversible.
This side is made with a soft flannel.
The hardest part about making one of these
was adding the bias tape, which I made using a scrap piece
of coordinating fabric, to pull the rope through.
As I stated above, I created my own pattern and
wasn't good about taking pictures along the way. I
wasn't sure if my baby nest would come out right,
but it ended up just perfect.
First I had to determine how wide and long I wanted
the nest to be. Then I created my pattern using
freezer paper and cut out the material.
I started sewing it together around the outer edge leaving
the bottom half open.
The bed part was made by using 4 layers of quilt batting,
then stitched around the outside edges and quilted to stay in place.
Next you add the bias tape and pull the rope through. Stuff the
sides with batting or Fiberfil and hand stitch the bottom closed.
The Baby Nest is now ready to use.
This Baby Nest is machine washable & dryer friendly.
Our DIL has washed and dried it a few times and
it has come out perfect. She loved using this Baby Nest
and plans on letting her sister use it also. She has gotten
so much use from this thing. They have used it in between
them in bed at night, taken it to friends and family's homes
and placed it on couches and floors to have the baby close by and safe.

Here is a picture of our Grandson in it sleeping.
He is almost too long for it. To extent the length,
simply untie the rope and leave the end open.
He loved laying in this nest. She would place him
in it and he would start kicking his little legs. He
was so happy.
This was one of her many Baby Shower gifts I made for them.
Eventually I will post more Baby shower gifts I made.
Check back next week because you won't want
to miss the scrumptiously decadent dessert I made.

That's it for this week.
Until Next Time,
Veronica