Sunday, March 29, 2015

DIY Easter Glitter Eggs


I thought that I would do a couple
of Easter/Spring vignettes and
incorporate some eggs into them.
 
I've been seeing Glitter Eggs
in all of the stores and thought
that these would give my vignettes
a nice Easter touch.
But I didn't want to pay the price they were asking for them.
 
I knew that these would be a very easy
project to do, especially since I had most
of the supplies at home.  I just needed the eggs.
 
I went to our local Family Dollar Store
and purchased two packs of plastic
eggs for $1.00 each.
 
 
DIY GLITTER EGGS
 
Supplies:
 
Plastic Eggs
Decoupage Glue (or any craft glue that dries clear)
Foam Sponge brush
Round Toothpicks
Glitter (match your glitter to the egg color)
(I used Martha Stewart glitters.  Her glitters are so pretty!)
Plastic container with lid for each glitter you are using
Plastic Spoon
Wax paper
 
 
1.  Take a round toothpick and insert it into one of the holes on the bottom of the egg,
leaving enough out to hold on to.
 
*I placed a length of masking tape on the lid of the plastic container and wrote the
brand name and color on it.  This way when I'm running low I will know exactly
which brand and color to buy.


2.  Using the foam brush, brush on a good layer of glue over the entire egg.
 

3.  Place the egg over a plastic container and sprinkle with the matching
glitter color, turning and sprinkling until the egg is completely covered with the glitter.
 
 
4.  Place the egg, with the toothpick still in it, on a piece of wax paper
to dry.  Let dry for about 1/2 hour.  After 1/2 hour, pick up the egg
using the toothpick, the bottom of the egg will still be wet,
 re-sprinkle the bottom of the egg with the glitter,
 place back on the wax paper with the dry side down.  Let dry completely.
 
 
5.  After the eggs have dried completely, gently pull out the toothpick.
Your eggs are now ready for use.
 
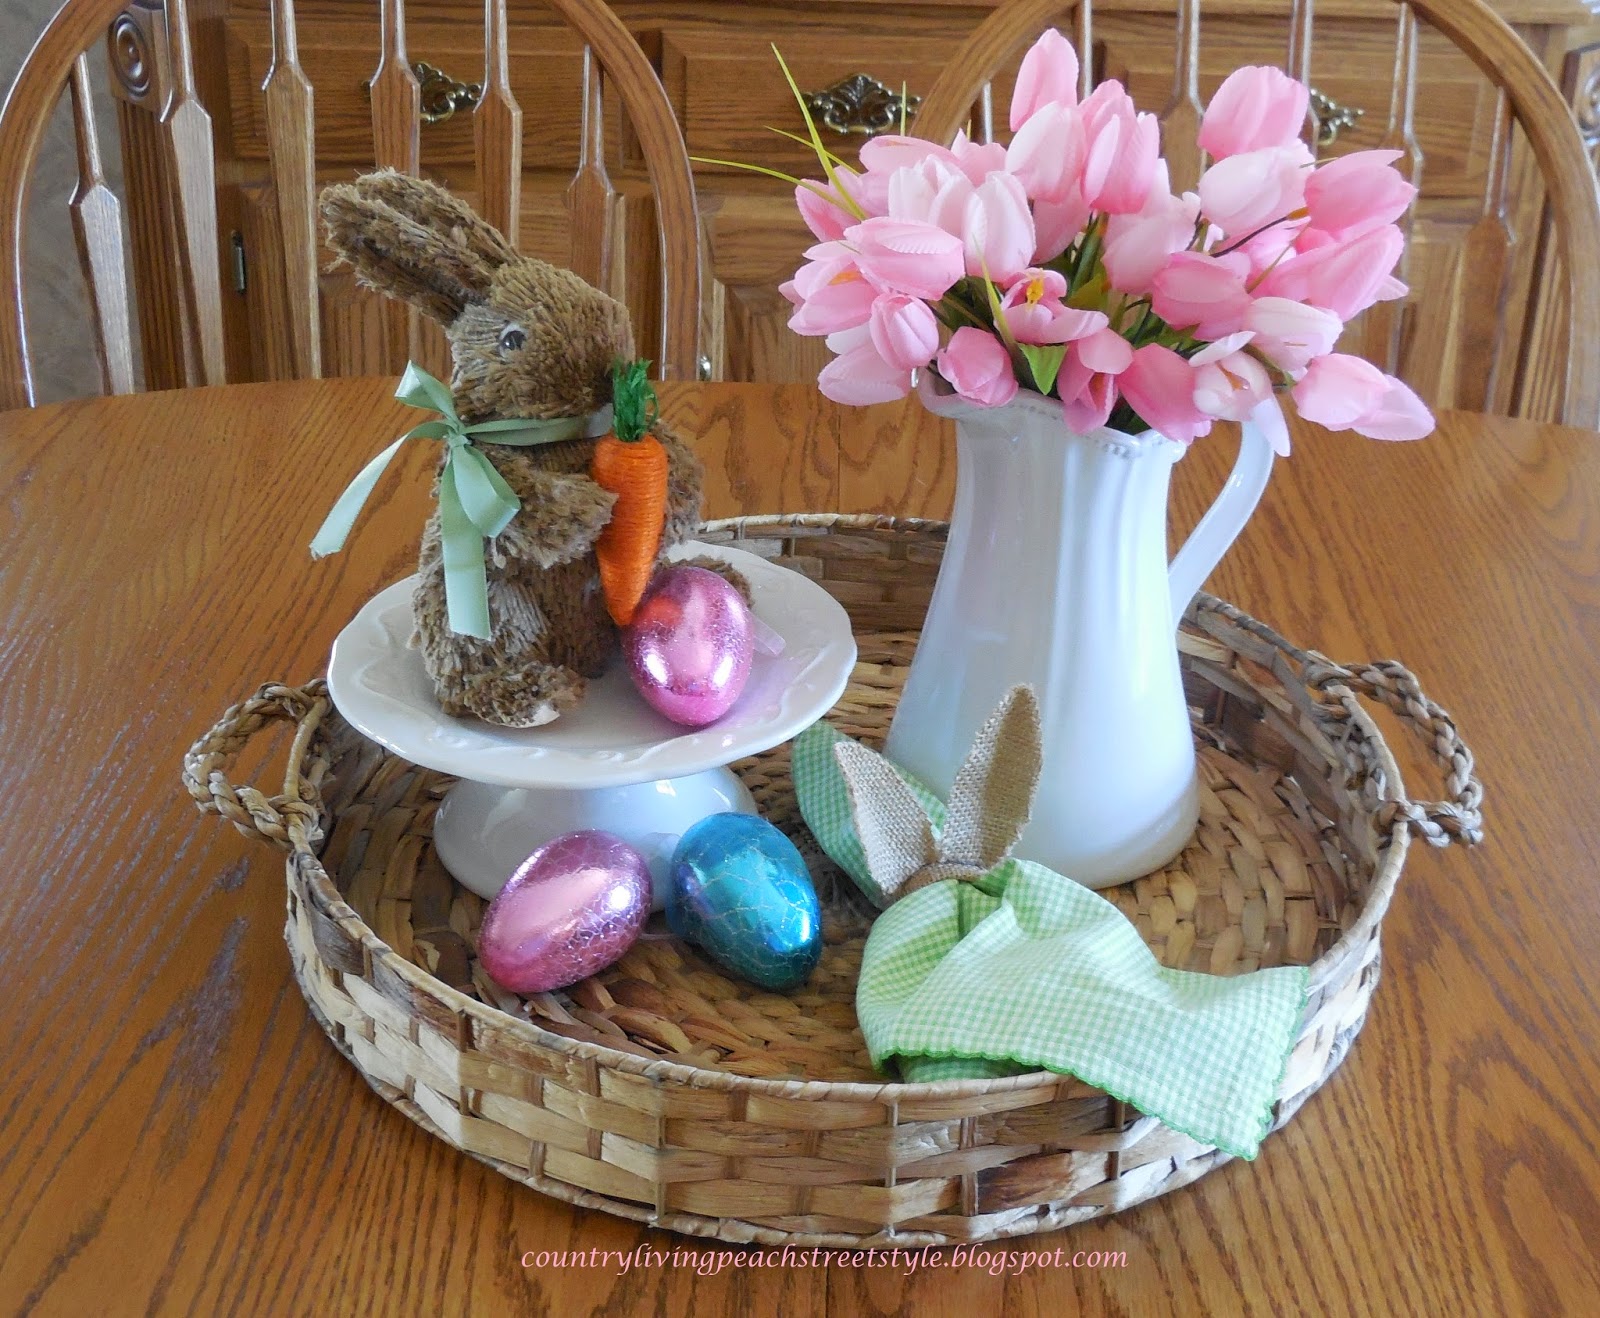
This is how I displayed mine in the kitchen.
 
 
My bunny cake plate and bunny I bought from Pier 1 Imports is
what inspired me to make the glitter eggs.
 
 
I purchased a Carrot cake to place on the cake plate.
Hubby wanted a piece of that cake SO BAD.
 I told him he had to wait until I got my pictures taken.
It was pure TORTURE for him!
 
 
My glitter eggs cost me $2.00 and about 1/2 hour to put together.
Simple and inexpensive!
 
By making my own glitter eggs I will be able to touch up the eggs, if need be,
matching the glitter perfectly.
 
This is the little vignette that sits on our Dining room table.
 
 
And another that sit on the buffet in the Dining room.
 
 
A basket of speckled eggs on a bed of moss.
 
 
And a final one that sits on the Dining room hutch.
 
 
That's it for this week.
Hope you enjoyed my simple tutorial and a glimpse of our home.
 
Until Next Time,
Veronica


Sunday, March 22, 2015

DIY Bunny Ears Napkin Rings


Since Easter is near I thought that I would do another Easter project that
has been on my "Projects To Make" list.
 
I noticed last year that Pier 1 was selling these
cute little bunny ears napkin rings made out of burlap, and this
year they popped up in Michael's.
So I knew that they were still popular.
 
Burlap is still HUGHLY popular
again this year.
 
*Pier 1 is again this year carrying these Bunny Ears Napkin Rings.
They are on sale for $2.36 per napkin ring.
Source:  Pier 1
Burlap Bunny Ears Napkin Ring
 
 
I was going to purchase a pair of these
but the more I looked at them the more I thought
that I would be able to make these myself.
Plus I had everything to make these.
I didn't have to purchase a thing!
FREE, FREE, FREE.
Who doesn't love that!
 
These little Bunny ears napkin rings are another
easy project to make.  Don't let the lengthy tutorial intimidate you.
I made 4 of these last night in about 2 hours.
 
*Caution:   If you plan on making these with small children please supervise
as there is hot glue and an iron involved.
 
BUNNY EARS NAPKIN RING TUTORIAL
 
Supplies:
 
Empty Paper towel or Toilet paper roll
Scrap pieces of Burlap
Scissors
Mod Podge,  or any craft glue that dries clear
Ruler
Iron
Hot Glue Gun
Heat-n-Bond (can be purchased from Walmart for under $2.00)
 
1.  Take your paper towel roll and cut a slit down the length of the tube,
measure off 1 inch increments.

2.  Cut off at the 1 inch lines.  These will be your rings.
 
3 & 4.  Cut a strip of burlap 2 1/2 inches wide by 6 inches long.
(I used leftover 5 inch burlap ribbon from a previous craft project.
I cut it 6 inches long and then cut it in half.)
 
4.  Fold in one short end of the burlap strip approx. 1/2 inch and press with your finger.
This will give your napkin ring a nice finished edge.
Don't worry about the other end because you won't
see it.
 
5.  Place your 1 inch paper towel strip in the center of the burlap strip,
making sure that the end is tucked under the folded edge.
 
6.  Completely cover the paper towel strip with a thin coat of
Mod Podge.  Let dry for a few minutes until tacky.  Don't dry completely.
You can speed the drying process along using a hair dryer.
 
7.  Fold the long edges in towards the center and overlap.
Using your finger, press and smooth the edges together.
 
8.  Add another layer of Mod Podge along the center to
tightly seal the edges together.  This will also prevent
the burlap from fraying.  Don't worry about any stray threads.
We will take care of those later.
Let dry completely.
 

While your napkin rings are drying you can create
your bunny ears.  *2 ears per napkin ring.
 
CREATING BUNNY EARS
 
1.  My bunny ears measure 3 1/2 inches long by 1 1/2 inches wide.
*You will need to cut 2 per bunny ear*
To cut down on cutting time, I cut a piece of burlap
3 1/4 inches wide by 3 3/4 inches long and folded it in half.
 
2.  Place your Heat-n-Bond in the middle of the folded burlap.
 
3.  Pin your bunny ear pattern on and cut out the bunny ear.
 
 
4.  Once you have your bunny ears cut,
Unpin and remove the top ear, leaving the Heat-n-Bond on the
bottom ear piece.
 
5.  Iron the Heat-n-Bond onto the bottom ear piece.  Let cool.
 
6.  Peel off the paper backing from the Heat-n-Bond and place the top ear piece on top.
 
7.  Using an iron, press the two pieces together.  Let cool and set aside.
You now have a thicker bunny ear which will not fray and
will be easier to bend and hold its' shape.
 
ATTACHIING THE BUNNY EARS TO THE NAPKIN RING
 
1.  Once your napkin rings have dried completely,
trim any loose threads and  run a line of hot glue along the top unfinished short end.
 
2.  Bring the finished edge around and place on top of the hot glue,
overlapping the edges to form a circle.  Using a clip (I used a clothes pin)
to hold in place until dry.
 
3 & 4.  Grab a bunny ear and bend the bottom of the ear about 1/4 inch,
add hot glue to the underside and attach to the top of the napkin ring, making sure
the overlapped edge in on the bottom and centered.
To prevent any burned fingers, use a wooden screwer to press the
ear onto the napkin ring.  Attach the 2nd ear.


5.  Bend and shape the bunny ears.  Trim any loose threads.
 
You now have a Bunny Ears Napkin Ring!
 
Place a napkin in the Bunny Ears Napkin Ring and display.
 
 
 You still have time to make these before Easter!
 
Until Next Time,
Veronica


Sunday, March 15, 2015

Whiskers and Homemade Chicken Salad

 
Lately I've been hungry for chicken salad.
I like making my chicken salad with grilled chicken breast.
This chicken salad is so versatile.  It would be good on
a bed of lettuce, in a wrap, made into a sandwich, or
placed in a dish and served with a side of crackers.
 
I served mine with Cracked Pepper and Olive Oil Triscuits.
So yummy for a quick lunch.
 
Since the weather here has been just beautiful I thought
now would be a good time for Hubby to grill some
chicken breasts for me.  Actually he grilled it
yesterday for me and I let it set in the refrigerator
overnight to absorb the grilled favor.
 
Hubby grills a mean chicken breast!  It is always so juicy
and flavorful.
 
This morning I put together my chicken salad and
let it sit in the refrigerator to chill until lunch time.
 
*Chicken salad recipe posted at the end of this post.
 
While I was letting the chicken salad chill I
thought I would create a bunny fold napkin.
 
These would be so cute to sit on each plate
for your Easter dinner table.
 
Here are the step-by-step instructions so that you too
can make these cute bunny napkins.
 
*Please ignore my dingy pressing board.  It gets used a lot for crafts.
 
1. Start with a fresh pressed square napkin.  Mine measures 18" x 18"
2.  Fold the napkin in 1/2 and iron a crease in the center as a guide line.
3.  Open the napkin and fold up to the crease line.
4.  Fold the napkin up a second & third time to create a long rectangle.
5.  Fold the rectangle in 1/2 and press a center crease line using your hand.
6.  Unfold the napkin back to the rectangle shape and fold the left
side down to the center crease line.
7.  Fold down the right side to the crease line.
8.  Fold the lower left and right sides of the napkin
up to the middle.
9.  Carefully turn the napkin over with the solid point facing up.
10.  Fold the top point down.
11.  Carefully turn the napkin over and fold the left & right
sides over to the center.  This will be the back of the bunny.
Press with a hot iron.
12.  Turn the napkin to the front and add your whiskers and nose.
I used a piece of twine and tied a knot in the center and unraveled
the ends to form whiskers.  Then I used a button for the nose.
You can either sew or glue these on.
Fluff the ears.
13.  Turn the napkin over with the ears facing down and
tuck the right side of the edge into the left side.
14.  Turn your bunny upright and fluff one final time and display.
 
Homemade Chicken Salad
2 1/2 cups diced cooked chicken
4 bacon strips, cooked and crumbled
1 (8 oz.) can sliced water chestnuts, drained and chopped
1/2 cup chopped celery
1 cup quartered green grapes
3/4 cup Hellmann's mayonnaise
1/8 cup chopped walnuts
1 tablespoon dried parsley flakes
2 teaspoons minced onion
1 teaspoon lemon juice
1/4 teaspoon ground ginger
2 dashes Worcestershire sauce
Salt & Pepper to taste
 
Combine chicken, bacon, water chestnuts, celery, grapes and walnuts in a large bowl; set aside.
In a medium bowl, whisk together the remaining ingredients; add to the salad and toss to coat.
Chill until ready to serve.
 
ENJOY!
Veronica